Monday, November 12, 2012

Harumi's Carrot and Tuna Salad

I wanted something really fast and simple for dinner today. So while milling around the supermarket Harumi’s Carrot and Tuna Salad came to mind. The mental cooking plan was simple, buy carrots and tuna, prep, microwave and eat. I’ll have dinner in 30 minutes. Perfect for a Monday evening! What I had failed to remember was that the last time I cooked this I had a mandolin at hand so getting the carrots into uniform julienne cuts was easy. This time I decided to practice my cleaver knife skills on my carrots and my carrot sticks turned out pretty decent but it took me a good twenty minutes or to hand cut my carrots ... so dinner still made it to the table but it took twice the time to make. Not such a fast dinner but still dead simple and delicious.


Carrot and Tuna Salad

Serves 4

Ingredients:
3 medium carrots, peeled
½ red onion, finely chopped
1-2 garlic cloves, peeled and finely chopped
1 Tablespoon sunflower or vegetable oil
1 tin of canned tuna, drained

Dressing:
1 Tablespoon rice vinegar
1 Tablespoon Dijon mustard
Soy sauce to taste
Salt and pepper to taste

Method:
1. Slice carrots thinly on a diagonal then stack three or four carrot slices and then slice lengthways to form long julienne cuts.
2. Mix julienne carrots, onion, garlic and oil in a medium-sized microwave-safe bowl. Cover and microwave for 2-5 minutes, depending on your microwave, until the carrots are lightly cooked.
3. Mix dressing ingredients. Add the drained tuna and then dressing and mix well. Serve hot or cold.

Labels: , ,

Thursday, December 30, 2010

Thomas Keller's Creamed Corn

For Christmas this year I chocked up a lot of cooking time. Half of the cooking was really planning. The planning is a fun process of reading through my cookbooks and flagging recipes and then running through the list of shortlisted recipes to see what is really feasible in the cooking time. One of the real winning recipes that I found this Christmas was Thomas Keller’s creamed corn from Ad Hoc at Home.

This recipe is really good. It is very simple and the flavours are divine. The cream and butter makes the creamed corn luscious and the pinch of cayenne pepper makes the dish pop with a gentle at the end. I loved it and the people I served it too loved it too – I’ve made this three times in five days! I’ve also made a ‘variation’ of it out of necessity, substituting calamansi for lime and I prefer it with latter.


Thomas Keller’s Ad Hoc at Home Creamed Corn Recipe
6 corn, shucked
1 large lime or 6 to 8 calamansi
2-3 tablespoons butter, unsalted
Salt
¾ to 1 cup heavy cream
A pinch of cayenne
Finely chopped chives

Directions
1. With a sharp knife, cut vertically down each ear of corn to slice off the kernels. Put the kernels in a large bowl, then hold each cop over the bowl and use a spoon or the back of a knife to scrape any remaining corn and the milk from the cob.
2. Grate the zest of the lime, preferably with a microplane grater; set aside. Cut the lime in half.
3. Melt the butter in a large frying pan over medium heat. Add the corn, squeeze about 1 tablespoon of the lime juice, or to taste, over the corn, and season with salt.
4. Reduce the heat to medium-low and cook until all of the liquid has evaporated, concentrating the flavour, and the corn is beginning to sizzle, 15 to 17 minutes.
5. Stir in ¾ cup cream, the cayenne, and lime zest. Continue to cook for 6 to 8 minutes, until the cream is absorbed by the corn. Add up to ¼ cup more cream if desired for a creamier texture. Add salt to taste and stir in the chives.

Labels: , ,

Wednesday, August 11, 2010

Alone in the Kitchen with a Truffle

Just like the book, Alone in the Kitchen with an Eggplant, this is a confession of when I’ve cooked for one and dined alone, with the intent of being selfish.

When a friend returned from down under with a truffle from Manjimup, Western Australia where The Wine&Truffle Co produces French black truffles, I decided that one truffle was only enough for me and I was going to consume all of it.

This is how I made my bowl of comfort, no measurements and probably not authentic (sorry Antonio!).

Truffle Pasta & Egg


Ingredients:
Fettuccine
Butter
Black truffle
Parmesan Cheese
Egg

Directions:
1. Boil fettuccine. Drain.
2. Add butter and few truffle shavings in the pan and heat gently.
3. Add cooked pasta and toss then add parmesan and stir.
4. Fry egg until white is firm but yolk is still runny. Place egg on pasta.
5. Add more truffle shavings and parmesan then season to taste. Eat immediately.

Labels:

Saturday, July 03, 2010

More No Knead - Walnut&Raisin and less ugly!


I’ve fallen in love with this no knead method of making bread. It is no knead and less mess and the crust even crackles when I pull the bread out of oven. And above all of it, it is amazingly simple, anyone can make bread.

The only issue I have with this recipe is the long time that it takes to ferment. It takes planning. The initial fermentation takes 12-18 hours and then 2 hours for the next proof. The initial fermentation is a little tricky to plan and the only time I managed to string together enough hours and to blend my social and bread fermentation schedule was on the weekends. So I’ve been thinking about how I could work the dough into my weekday schedule and I’ve figured out a way of making this bread-work-life balance work. If I wake up 20 minutes earlier on a weekday to mix the dough and to set the fermentation process, I can shape and proof the dough when I get home from work, have a little dinner and pop it in the oven 2 hours later, then volia I’d get fresh bread for the next day! Hurray! Hurray!

Ingredients
3 cups bread flour
½ cup raisins
1¼ teaspoon table salt
¾ teaspoon cinnamon
½ cup walnuts
1½ cups water
½ teaspoon instant or active dry yeast
pinch fresh ground pepper
wheat bran, cornmeal or additional flour for dusting

Directions:
1. In a medium bowl, stir together the flour, raisins, walnuts, salt, cinnamon, yeast, and pepper, mixing thoroughly. Add the water and, using a wooden spoon or your hand, mix until you have a wet, sticky dough, about 30 seconds. If it’s not really sticky to the touch, mix in another tablespoon or two of water. Cover the bowl and let sit at room temperature until the surface is dotted with bubbles and the dough is more than doubled in size, 12 to 18 hours.
2. When the first rise is complete, generously dust a work surface with flour. Use a bowl scraper or rubber spatula to scrape the dough out of the bowl in one piece. Using lightly floured hands or a bowl scraper or spatula, lift the edges of the dough in toward the center. Nudge and tuck in the edges of the dough to make it round.
3. Place a tea towel on your work surface and generously dust it with wheat bran, cornmeal, or flour. Gently place the dough on the towel, seam side down. If the dough is tacky, dust the top lightly with wheat bran, cornmeal, or flour. Fold the ends of the tea towel loosely over the dough to cover it and place it in a warm, draft-free spot to rise for 1 to 2 hours. The dough is ready when it is almost doubled. If you gently poke it with your finger, it should hold the impression. If it springs back, let it rise for another 15 minutes.
4. Half an hour before the end of the second rise, preheat the oven to 250 degree Celsius, with a rack in the lower third, and place the covered heavy pot in the center of the rack.
5. Carefully remove the preheated pot from the oven and uncover it. Unfold the tea towel and quickly but gently invert the dough into the pot, seam side up. Cover the pot and bake for 30 minutes.
6. Remove the lid and continue baking until bread is a deep chestnut color but not burnt, 15 to 30 minutes more (It took me about 15). Use a heatproof spatula or pot holders to gently lift the bread out of the pot and place it on a rack to cool thoroughly.

Labels: ,

Sunday, June 13, 2010

My No-knead (+No-Shape) Olive Loaf

I'm guilty of ugly baking!

Olives have been my latest thing. I’ve been tossing it in salads, consuming them on their own and I’ve been trying to make a good olive loaf.

I haven’t had too much success with the olive loaf. My first yoghurt olive bread was a total disaster and it ended up in the bin. The second loaf wasn’t too fantastic either and I’d like to forget about it. So I’ve abandoned the yoghurt olive bread recipe that have embraced a relatively more time consuming and more effortless approach to this. The new approach – the no knead approach. With the help of Jim Lahey’s wisdom and his recipe, I’ve tried this new method and have had moderate success. I baked an ugly shapeless loaf but it tasted much better. Work in progress but one step closer!


Ingredients
3 cups bread flour
About 1 ½ cups roughly chopped pitted olives
¾ teaspoon instant or other active dry yeast
1½ cups cool water
Wheat bran, cornmeal, or additional flour for dusting

Method
1. Mix all of the dry ingredients in a medium bowl. Add water and incorporate by hand or with a wooden spoon or spatula for 30 seconds to 1 minute. Lightly coat the inside of a second medium bowl with olive oil and place the dough in the bowl. Cover the bowl with plastic wrap and let the dough rest 12 hours at room temperature.

2. Remove the dough from the bowl and fold once or twice. Let the dough rest 15 minutes in the bowl or on the work surface. Next, shape the dough into ball. Generously coat a cotton towel with flour, wheat bran, or cornmeal; place the dough seam side down on the towel and dust with flour. Cover the dough with a cotton towel and let rise 1-2 hours at room temperature, until more than doubled in size.

3. Preheat oven to 250°C. Place the pot in the oven at least 30 minutes prior to baking to preheat. Once the dough has more than doubled in volume, remove the pot from the oven and place the dough in the pot seam side up. Cover with the lid and bake 30 minutes Then remove the lid and bake 15-30 minutes uncovered, until the loaf is nicely browned.

Labels: ,

Thursday, June 11, 2009

Keep Stirring

“These days, one of the most important stages of making a risotto is considered to be the mantecatura, which comes from the Spanish word for butter, mantequilla. It means the beating on of butter and cheese right at the end of cooking, to give the risotto that fantastic creaminess.”

- Giorgio Locatelli, Made in Italy

I love this book. It is so generous and honest in wanting to pass on the knowledge that Locatelli has acquired over the years. I haven’t read it from cover to cover but I’ve read sections of it and reading the risotto section made me feel loved. As result, I've been trying to pass on that love and I’ve been stirring a lot of risotto. I’m still learning about it.

Risotto is a beautiful thing. The sheer simplicity of it demands that you pay attention to the quality of ingredients and patience that you invest in the process. You can’t rush it; you have to coax it gently with your wooden spoon, slowly encouraging each grain to soak in as much it can manage.

I’d admit risotto seems intimidating but it really isn’t. You need to keep stirring but can blink and you can even walk away from the pot for a brief period and it’ll forgive you. But if you need to keep your dinner guest occupied, standing conversation around the pot with people taking turns at stirring works as well.

Is there a real technique behind the stirring? I don’t know. Someone said we could only stir in one direction for a reason I cannot remember. Someone else advised, we should stir in a figure 8, I have tried both of that and stirring in both directions and I don’t see any major differences. At least I think the risotto turned a blind eye to my inconsistencies.

And for a dish that has intimidated many, it is ironically something that is very adaptable, you can put anything in it – there are plenty of variations in the book but the for the last risotto I stirred, I used Locatelli’s basic risotto recipe and added roasted butternut squash – delicious!

Roasted Butternut Squash Risotto
Serves 6


Ingredients
1 butternut squash
1 tablespoon olive oil
2.5 litres vegetable stock
50 g butter
1 onion, very finely chopped
400 g Arborio rice
125ml dry white wine
75g cold butter, cut into cubes
100g Parmesan, grated
salt and pepper

Method:

  1. Slice squash in half, remove seeds, and rub with olive oil. Roast face-side down in a 180 degree Celsius oven for 40-45 minutes or until tender when pierced.
  2. Scoop out the flesh and mash and set aside.
  3. Melt the butter in a heavy-based casserole over medium heat. Add the onion and cook very slowly for 5-7 minutes until soft.
  4. Add the rice and stir for a few minutes until heated through and well-coated with the butter.
  5. Stirring continuously, add the white wine and cook for a few minute to allow the alcohol to evaporate.
  6. Add a ladleful of hot stock and stir until absorbed. Continue to add the stock a ladleful at a time, stirring continuously, until all the stock is absorbed - about 15-17 minutes. When cooked, the rice should tender but firm in the centre.
  7. Stir butternut squash then leave to stand for 1 minute.
  8. Add butter and Parmesan, stirring vigorously with a wooden spoon. Season to taste and serve.


Labels: , ,

Saturday, April 11, 2009

Once again: Chicken & Paprika

I’ve put them together again, chicken and paprika. I think I’ve found a slightly better combination though. Chicken, paprika and chorizo; this trumps the first recipe I worked on. After making this about three times for different crowds, I’m convinced this is a winner. Maybe chorizo will be my new bacon, smoky and paprika included!


Ingredients:
1 tablespoon olive oil
2 chorizo, sliced into 2-cm thick coins
8 chicken thighs
2 red onions, peeled and chopped
8 garlic cloves, peeled and smashed
15 cherry tomatoes, halved
1 rounded tablespoon paprika
90 ml shao hsing wine
6 sprigs of thyme
Salt and pepper to taste

Method:

  1. Heat olive oil in a heavy based pan or Dutch oven and brown chorizo and set aside.
  2. Using the same pan, brown the chicken pieces until the skin is golden brown. Remove and set aside. Reserve about 2 tablespoons of oil and discard excess.
  3. Sweat onions and garlic in the pan for about 3 minutes and then add the paprika and tomatoes and fry for another minute.
  4. Add shao hsing wine and deglaze, scrapping the brown bits from the bottom of the pan.
  5. Add chorizo, chicken and thyme into the pan. Add water until it comes up to the halfway point of the chicken. Bring to a boil and then braise for 90 minutes. Season with salt and pepper to taste.

Labels: , ,

Saturday, November 22, 2008

Paprika

I’ve recently fallen in love with paprika. I find myself unconsciously sprinkling it in more and more of my cooking – stews, whilst sautéing mushrooms, on potatoes, on chickpeas, on everything really.

Here’s one instance: I had an open bottle of Chardonnay, a chicken and a task to cook dinner. So whilst sweating down my onions, carrots, garlic and celery again I found myself reaching for the tin of paprika and sprinkling it as if it was my magic dust into the cast iron pot. It is great. Paprika rocks my world – maybe it is a cooking magic dust.

Paprika Chicken Stew
Serves 4-6


Ingredients:
4 tablespoons olive oil
1 whole chicken, cut into 8 pieces
2 medium carrots, sliced
2 onions, peeled and chopped
3 celery stalks, chopped
4 garlic cloves, peeled and smashed
1 rounded teaspoon paprika
750 ml bottle of Chardonnay
3-4 rosemary sprigs
2 bay leaves
Salt and pepper to taste

Method:

  1. Heat 2 tablespoons of olive oil in a heavy based pan and brown the chicken pieces until the skin is golden brown. Remove and set aside. Discard excess oil.
  2. Heat remaining olive oil in a heavy based pan or a dutch oven and add carrots, onions, celery, garlic and paprika then slowly sweat vegetables until soft, about 4-5 minutes.
  3. Add the whole bottle of wine, deglazing and scrapping the brown bits from the bottom of the pan.
  4. Return the chicken to the pan. Add rosemary and bay leaves. Bring to a boil and then simmer for 20-25 minutes. Season with salt and pepper to taste.

* Optional, you can further thicken or enrich the stew with cream and serve over rice, potatoes or noodles.

Labels: , ,

Sunday, December 02, 2007

Cooking Laksa

I wonder who created laksa?

Maybe the origins was something like mole, where someone just used whatever ingredients that they had at hand and surprise, something beautiful was created. I don’t know. And how did all the different permutations come about?

Laksa, in this case laksa lemak, is a great dish. It is rich and comforting for the soul and it is a magic carpet ride of hot, spicy, fragrant and creamy sensations. For some reason I’ve never thought about making laksa from scratch. It does seem like quite a tedious task and since I work close to a pretty good laksa stall, it really doesn’t make sense. But since a Singaporean friend who has sense migrated was visiting for lunch I thought it was a perfect opportunity to try my hand at this.

You could make laksa for one, but if you are going to use all that elbow grease to pound all your ingredients rather than throwing it in a food processor (as I did, my excuse was that I woke up late and my guest were arriving so I couldn’t let them starve), you might as well get some people to help to make tonnes of it and they can enjoy the fruits of their labour at the same time. Once you get that pounding out of the way, everything else is rather simple. All you need to do is to fry the paste, add liquids and simmer.


Laksa

100 g cooking oil
150 g dried shrimp, soaked till soft and drain
400 ml coconut milk
1.5 litres chicken stock
Sugar to taste
Salt to taste
20 g tofu puffs, cut into strips or cubes
400 g thick rice noodles, blanched
Laksa leaves, washed and chopped

Laksa Paste
1 stalk lemon grass, white portion only sliced
100 g blue ginger/galangal, peeled and sliced
20 g candlenuts, roughly chopped
200 g shallots, peeled and roughly chopped
15 g chilli paste
20 g belachan
1 Tbsp ground coriander seeds
1 Tbsp ground turmeric

Condiments
16 prawns, shelled and boiled
30 g bean sprouts, blanched
Hard boiled eggs, halved

Method:

1. Prepare laksa paste. Grind all ingredients except turmeric and coriander seeds in a blender until a fine paste then add turmeric and ground coriander seeds.

2. Heat oil in a large heavy based pot. Fry laksa paste for about 5 minutes, add dried shrimp and fry for another 3 minutes. Add coconut milk and stock. Bring to a boil then simmer for 30 minutes. Season with salt and sugar to taste.

3. Strain stock and reserve dried shrimp. Grind dried shrimp in a food processor and stir into the stock for a thicker consistency. Add tofu puffs and simmer for another 5 minutes.

4. Arrange condiments and noodles in a serving bowl and ladle over hot gravy and sprinkle with laksa leaves as desired.

Labels: , ,

Thursday, January 25, 2007

In Praise of Eggs

I’ve gone a little eggy. On Monday I bought a tray of regular chicken eggs, eight salted duck eggs and a dozen preserved duck eggs or what are also known as century eggs. Today is Thursday and I need to go shopping for more. Short of a heart attack diet, I have averaging a consumption of 4 eggs a day, excluding egg traces that might be found in confectionary, cakes and spreads. Other than consuming runny egg yolks with my own homemade chilli-spiked tomato sauce and scrambled eggs, I’ve learnt to utilise the other types of eggs a little more.

The century egg that might seem vile and strange to the uninitiated can be a little unnerving. In addition to that, the free publicity that it had received on it, was not at all positive as seen on Fear Factor, and I personally have been stared down at tables with the worst response being “Are you really going to eat that? You know they use horse pee in the preparation right?” honestly, I don’t know if they use horse pee, but it did put me off those black eggs for a good 6 months of so. Nonetheless, they are still delicious and they are a Chinese delicacy. They might smell funny to some, but the yolk is rich and creamy and the resulting preserved egg white turns into a springy jelly-like substance. Yes, it might be stinky, but durian is also stinky and last I checked so is a long list of cheeses and they are all still considered delicious. During the course of the week I’ve also taken a page from Xi Yan, in using the century egg in its preparation of its house signature salivating chicken, and it really does help in keeping the mouth flames at bay.

The salted egg is also something that I’ve learnt to cook with. Before this week I had only known how to use it through boiling, peeling and eating the yolk as it is with tofu and rice, but this week I’ve added another step, sautéing! This additional step actually enhances the fragrance of the yolk, a very useful kitchen tip.

Now since I had acquired new found knowledge about salted duck yolks, what should I do with it? I had a few ideas but that got derailed when I could not say no to my rare chance of scoring fresh crayfish from my fishmonger. All I needed was to find a way to tie the two ingredients together and here’s a dinner dish that I came up with: Spaghetti with salted eggs and crayfish

Spaghetti with salted eggs and crayfish
Serves 4

Photobucket - Video and Image Hosting

Ingredients:
8 salted duck eggs
2 tablespoons butter, at room temperature
4 crayfish, cleaned and halved
300 g dried spaghetti
4 tablespoons extra virgin olive oil
200 g Chinese flowering cabbage (choy sum / cai sin), washed and trimmed
Salt to taste
Freshly cracked black pepper to taste

Method:
1. Bring a pot of water to the boil. Gently lower duck eggs and boil, uncovered, for 10 minutes. Strain eggs and whilst still hot, halve eggs and scoop yolks unto a bowl. Discard egg whites and shell. Mash yolks with a fork and set aside.
2. Pre-heat grill to 180°C. Mix 1½ tablespoon yolk with butter and spread over crayfish meat. Grill for 8—10 minutes.
3. Meanwhile, bring a pot of salted water to the boil. When it comes to a rolling boil, add pasta and cook as directed until al dente, then drain.
4. When the pasta is 2 minutes from being ready, heat oil in a large saucepan over medium low heat. Add egg yolks and sauté for 1 minute. Add flowering cabbage and sauté for another minute. Season with salt and pepper to taste.
5. Remove saucepan from heat, add pasta and toss well. Divide equally into 4 individual bowls, top each bowl with 2 halves of crayfish and serve.

Labels: , , ,

Thursday, December 28, 2006

Final cooking in 2006

I spent a good part of the last few days of 2006 in the kitchen cooking for family, friends and for myself. I had another embarrassing failure of an over-salted salmon fishcake that some first-time guests were too polite to not finish, while I could only swallow one bite of my own, and thankfully the rest were better. I’m also as happy as a clam at the fact that most of my dishes that I cooked on the eve of 2007 turned out pretty damn good after spending a good part of the year perfecting a handful of dishes with numerous disasters edible along the way. Alongside these, I’ve also had beginners luck with these two dishes over the past week.

Spaghetti ai ricci di mare (Uni pasta)
Serves 4

Photobucket - Video and Image Hosting

1 tray of sea urchin roe
2 tablespoons + 4 tablespoons extra virgin olive oil
5 sprigs Italian parsley, chopped
2 - 3 cloves of garlic, chopped
1/4 tsp chilli flakes
salt to taste
400 g dried spaghetti

1. Bring a large pot of salted water to the boil and cook pasta according to the timing indicated on the package until al dente.
2. Meanwhile, gently mix sea urchin roe, 2 Tbsp extra virgin olive oil, parsley and salt to taste together in a large glass bowl.
3. Heat 3 Tbsp of extra virgin olive oil, garlic, chilli flakes and a pinch of salt until the garlic turns a darker yellow but not brown, about 5 minutes.
4. When pasta is ready, drain but save about 1 Tbsp of pasta water. Add pasta and reserved pasta water to the urchin roe mixture then pour over garlic and chilli oil. Toss well and serve.

Crab Wontons in Lemongrass Broth
Serves 8 – 10 as an appetiser

Photobucket - Video and Image Hosting

Lemongrass broth:
2 litres chicken stock
3 stalks lemongrass, trimmed and chopped
Peels from a lemon
3 stalks of spring onion, cut into 5 cm lengths
1 tsp sugar
Salt and pepper to taste

To make stock:
1. Bring chicken stock to the simmer.
2. Add remaining ingredients and simmer, uncovered for 20-25 minutes, then strain. Check seasoning and set aside.

Crab wontons:
350 g crab meat
2 tsp olive oil
11/2 tablespoon finely chopped coriander
2 tablespoons finely chopped spring onions
½ teaspoon soy sauce
¼ teaspoon five-spice pepper
1 teaspoon grated lime zest
35 wanton skins + extras

To make wantons:
1. Combine all ingredients except wanton skins.
2. Place ½ a teaspoon of crab mixture in the middle of the wanton skin then dab the edges with water. Fold the wanton skin to make a triangle, then take the base edges and turn them about 45 degrees till they meet. Repeat till all the crab filling is used.

To assemble:
1. Reheat soup.
2. Bring another pot of water to the boil, then drop a few wantons in at a time. Remove as the float to the surface and transfer to serving bowls.
3. Ladle hot soup over wantons and garnish with sliced spring onions and serve immediately.

Labels: , , , , ,

Friday, December 01, 2006

Flourless Peanut Butter and Chocolate Chip Cookies

I sometimes think I have the attention span of a 5 year old, which explains why I will probably never be a patissier, a baker maybe, but never a pastry artist. There are a few foolproof baking recipes that I have found and mastered, which have a natural buffer for failure, so even if the cookies turn out as ugly cookies, I get forgiven because they shine in the flavour department. I recently found another recipe that can be put together in less than 10 minutes excluding baking time, other than measuring, it is an under-three-steps cookie: measure ingredients, stir them together, shape them and pop them into the oven. And, to me, there is nothing better than the combination of peanut butter and chocolate, two of the many of my favourite foods. Hersey’s got it spot on when they created those Reese’s Peanut Butter Cups, and it’s a damn shame they don’t sell those here! As an alternative to Reese’s but a rather far substitute, this recipe makes a good double dozen of slightly sticky soft gooey delicious peanut butter and chocolate chip cookies.

Photobucket - Video and Image Hosting

Flourless Peanut Butter and Chocolate Chip Cookies
Makes 24

Ingredients:
250 g chunky peanut butter
200 g golden brown sugar
1 large egg
1 teaspoon baking soda
1/2 teaspoon vanilla extract
160 g miniature semisweet chocolate chips

Method:
1. Preheat oven to 180°C.
2. Mix all ingredients except chocolate chips in medium bowl. Mix well then add in chocolate chips.
3. Using moistened hands, form generous 1 tablespoon dough for each cookie into ball. Arrange on 2 ungreased baking sheets, spacing 5 cm apart.
4. Bake cookies until puffed, golden on bottom and still soft to touch in centre, about 12 minutes. Cool on sheets 5 minutes. Transfer to racks; cool completely.

Recipe taken from: Bon Appétit, September 1999

Labels: , , ,

Saturday, November 11, 2006

When you fail, try again

After my spectacular failure with foie gras, I was never sure if I dared to attempt it again. But I recently attempted to overcome my fear of cooking the huge lob of fatty liver, bit by bit: slices rather than a whole liver and a simpler recipe. I also recently spent some time talking to a chef who spent a long time mastering the art of cooking foie gras, who explained to me, the some important basics: it needs to be sliced not too thin or thick, and use butter and oil to raise the temperature. Also, after working through numerous recipes with him, I more or less concluded that one minute on each side would give me my golden brown crust and my creamy soft centre. I cooked with one eye on the liver and the other fixed on the second hand on my watch, scrambled to flip it after a minute and I succeeded! I’ve bounced back from my spectacular failure, I can now cook foie gras! For that evening’s experiment, I used Tetsuya’s recipe of pan-fried duck foie gras with rice, honey and soy.

Photobucket - Video and Image Hosting

Pan-fried Duck Foie Gras with Rice, Honey and Soy
This makes 4 servings

4 pieces of 30 g slices of duck foie gras
1 tablespoon of olive oil
1 tablespoon of butter
8 tablespoons of steamed short-grain rice
1/4 avocado, finely diced

Avocado Puree
1/2 avocado, peeled and sectioned
100 ml milk
salt and cracked black pepper
1 teaspoon finely chopped chives

Sauce
1/2 tablespoon honey
50 ml soy sauce
1 teaspoon lemon juice
To make the sauce, bring the ingredients to a boil.

Garnish
Toasted sesame seeds

Directions:
1. Prepare avocado puree. Blend together the avocado and the milk. Add salt and black pepper to taste, and then add in the chives.
2. To make sauce, bring all the ingredients to the boil.
3. Mix the rice with the diced avocado.
4. Heat butter and oil in the pan until nearly smoking, sear foie gras slices on both sides.
5. To serve, place about 2 tablespoons of the rice and avocado mixture in the base of each serving plate. Spoon on a little avocado puree and add the foie gras. Spoon over some sauce, then garnish with sesame seeds and chives.

Recipe taken from: Tetsuya by Tetsuya Wakuda, Ten Speed Press

Labels: , ,

Thursday, August 03, 2006

Bread Therapy

“Push, stretch and fold, push, stretch and fold, push, stretch and fold…” sometimes there is nothing more therapeutic than doing performing a mindless repetitive action that has a constructive end product.

Now I understand why I’ve been warned, “If you start baking bread, you wouldn’t stop!” While pondering over issues that troubled my mind, there was nothing better than kneading dough. Maybe it’s a need to feel in control of something when other things seem beyond your control, but kneading dough, this very tactile activity, is very good for the soul. Not to mention, you can freshly baked bread to consume with a thick spread of nutella or peanut butter if you still feel blue after your own bread therapy session.

Photobucket - Video and Image Hosting

Sesame Flatbread
Makes 4 flatbreads

Ingredients:
200 g bread flour
½ tsp sea salt
3 g dry active yeast
170 ml tepid water
1 Tbsp olive oil + a little extra
1 Tbsp sesame seeds

Method:
1. Place flour and salt into a large mixing bowl.
2. Dissolve yeast in water. Slowly add water to flour, kneading to bring the dough together.
3. As soon as it comes together, turn dough out onto a floured surface and knead for about 5 minutes until the dough is smooth, then cover with a cloth and set aside to rest for 45 minutes.
4. When dough is ready, divide into 4 equal portions and roll out on a floured surface to circles of about 15-20 cm in diameter.
5. Place on a baking tray, drizzle with olive oil and sprinkle sesame seeds. Bake in a preheated oven at 230°C for 5-10 minutes. Each bread should partially bubble up and colour slightly yet not be crisp.

Labels: , , ,

Saturday, July 22, 2006

Orange Orange Obsession

A friend once told me, the orange is like the earth. Like the earth, which is composed by 3 elements—crust, mantle and core—the orange also has 3 distinct portions: the zest, the white pith and the juicy centre.

Photobucket - Video and Image Hosting

The juicy centre is what I like best. Best when eaten raw, either cut into wedges and stretched before eating or simply halved and gorged out with a metal spoon. Nothing beats nature’s clever design of cramping thousands of tiny sacs that squirt flavour when bitten into. The other thing I love is juicing oranges. I find the process of rolling then to break the sacs, halving and then squeezing them for juice is not only therapeutic with a drinkable end product that is gratifying and refreshing.

Other than its core, I’ve re-discovered and learnt to appreciate another aspect of the orange, its zest. Although I’ve mindlessly followed recipes, which have called for orange zest to be added into stews and baked goods, I guess I never really did stop to consider the real oomph that gives to the foods it is added to… until last week. Inspired by a Homemade Spaghetti with Lobster, Basil and Orange Oil dish that I had in Union Square Café, where the orange oil played a primary role in lifting the dish and giving it subtle citrus accent, I started off my orange-obsession weekend by infusing orange oil. Once I started zesting, the scent of the natural orange oil was addictive, I could not stop! I started looking for other ways that I could transform orange peels that I normally trash after extracted their juicy pulp. After an afternoon of zesting, cooking random orange zest recipes, cleaning out my fridge of my leftovers, I'm quite chuffed that I managed to put together a rather pretentious Union Square Café wannabe home-cooked lunch dish what I now call my Double-Orange Capellini with Prawns and that took me nearly 2 hours to complete.

Double-Orange Angel Hair with Prawns
Serves 2

Photobucket - Video and Image Hosting

Ingredients:
1 Tbsp Olive oil
1-2 cloves Garlic, peeled and chopped
½ tin of whole Roma tomatoes, crush tomatoes
6 Prawns, shelled and minced
150 g Angel hair
5 Basil leaves, chiffonade
Orange oil (recipe follows)
Orange zest confit (recipe follows)

Method:
1. Heat olive oil in a frying pan and sauté garlic until fragrant. Add crushed tomatoes and 50 ml water, then simmer, uncovered for 10 minutes. Season with salt and pepper. Set aside.
2. Bring a pot of salted water to the boil. Cook angel hair until al dente, then drain and save some of the boiling liquid.
3. Heat a frying-pan with butter, sauté prawns, and then add sauce to heat through. Remove from heat, add pasta and basil, then toss and mix well.
4. Drizzle with orange oil and garnish with orange zest.

Photobucket - Video and Image Hosting

Orange oil
Makes about 250 ml or 1 cup

Ingredients:
250 ml Olive oil
Zest of 1 orange
¼ tsp black peppercorns
Pinch of salt

Method:
1. Combine all ingredients in a small heavy-bottom pot and bring to a simmer on medium heat.
2. Reduce heat and simmer for 30 minutes.
3. Set aside to cool completely, then use as required.

Orange zest confit

Ingredients:
1 orange
100 ml water
30 g sugar

Method:
1. Peel orange zest using a potato peeler and julienne.
2. Place orange zest in a colander. Pour boiling water over to blanch and then run under cold water. Repeat process 3 times.
3. Bring water and sugar to the boil, reduce heat to a dimmer, add zest and simmer for 20 minutes. Store until ready to use.

Labels: , ,

Friday, June 02, 2006

ree-SOH-toh

Risotto, my latest obsession. For the past 2 weeks, it has been the only thing that I want to cook in my kitchen and talk to people about, with one conversation leading to dinner plans with a mutual risotto-lover friend at an Italian restaurant all in the name of tasting research! In search of that perfect al dente, creamy bowl of rice, I decided to conduct some technical research: firstly read, re-read and cross-referenced various sources that explained the technique of making the perfect risotto and compare recipes and the proportion of rice to stock.

This is what I’ve learnt from my self-thought risotto cooking lesson. Surprisingly, risotto is not that too difficult to make. I’m not sure if you should stir vigourously or not. I think at the moment I’m going to the “stir occasionally” school of thought. Logically through observation, stirring the rice too often might disturb it from absorbing the hot stock and not stirring at all might be prejudicing the grains at the bottom and might have the risk of burning the bottom.

As with most things, stock forms the basis of cooking. Sometimes I cheat and use ready to use stock that comes in a tetra pack, but I often find that my sauces, soups or whatever end product I’m trying to achieve usually turns out too salty. So for my risotto experiment, I was not prepared to muck about, so I collected my chicken carcasses and mire poix and did some diligent simmering.

The first risotto attempted: wild mushroom risotto. Flavour was my number one issue with the risotto, so I had a variety of wild mushrooms and decided to finish off with my terribly delicious tetsuya’s truffle butter. I’m rather pleased with the way the first attempt turned out, more tweaking needs to be done, but I think I did pretty well to put my risotto obsessed mind at rest for a while.

Wild mushroom risotto
Serves 4


Ingredients:
1/4 cup extra-virgin olive oil
1 medium onion, minced
2 cups Arborio rice
1/2 cup white wine
4 cups chicken stock, hot
300 g mixed wild mushrooms
4 tablespoons truffle butter
1/2 cup freshly grated Parmigiano-Reggiano + extra

Directions:

1. Heat olive oil in a 12 to 14-inch heavy bottom pot or dutch oven over medium heat.
2. Add onion and fry for 8 to 10 minutes, stirring occasionally with a wooden spoon or silicon spoon, or until softened and translucent but not browned
3. Add rice and stir with a wooden spoon until toasted and opaque.
4. Add wine to the toasting rice and 2/3 cup of stock and cook, stirring, until it is absorbed.
5. Continue adding 2/3 cup at a time, waiting until the liquid is absorbed before adding more. Just before adding the last 2/3 cup of stock, add mushrooms. Cook until the rice is tender and creamy and yet still a little al dente, about 15 minutes.
6. Remove from heat, add butter and cheese and cover pot and leave for 2 minutes. Remove lid and stir and mix well.
7. Divide risotto into 4 portions and serve with extra cheese.

Labels: ,

Sunday, May 21, 2006

Cooking with Maple Syrup

After 
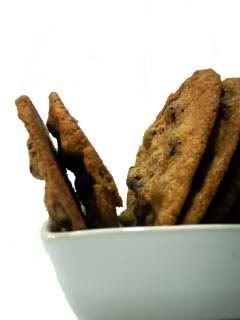
hinata’s zucchini flower and fig theme dinner a few months back, I took on the responsibility of hosting the next cooking project. I spent a few nights lying in bed trying to think of what to whip up for the guest that I had invited, I was a little intimidated. The problem with having foodies over is that you cannot serve them bad food and they are discerning eaters. I thought about going with dishes that I have more or less perfected through numerous taste-and-tweak sessions, but I felt like experimenting, so I still had to answer the pertinent question, what to cook? I pottered about the kitchen looking for some inspiration and I found the sweet gifts of maple syrup #2 amber and maple syrup mustard (and delicate and delicious homemade macaroons) that Clement of a la cuisine gave me when we met up in Toronto, alas, I had my answer, I’ll have a maple syrup-themed lunch!

I haven’t got too much experience in cooking with maple syrup; all I knew was that it was the golden liquid that I enjoy with my waffles and pancakes. So I decided to consult the source, Clement, who pointed me to 2 good recipes and conducted some research of my own. My research was twofold; the first was physical test: I opened the bottle and was greeted by a rich waft smell of caramel then I dipped my pinky finger into the bottle and tasted a strong maple taste. The second thing I did was to gather as much as information as I could, I found out that in Ontario, maple syrup into two broad categories, #1 and #2, the former being lighter in colour and sub-divided into ultra-light, light and medium, this is the maple syrup that we drizzle or drown out waffles and pancakes with and the latter is darker in colour and stronger flavoured, which is also the cooking maple syrup.


I was feeling slightly more educated and so I was ready to cook. The original menu cooked sounded like this: Sweet Potato Soup with Nutmeg and Maple Syrup, Maple Syrup Glazed Salmon with Mustard Mashed Potatoes and Maple Syrup Tart. That was the original plan, but it all went pear-shape when I was preparing my maple syrup glaze that I realised that I only had about two tablespoons of maple syrup left, just enough for the soup, but definitely not enough for a whole tart. Plan B that was hashed that night was to go with something simple and equally delicious, a comforting sticky date pudding with caramel sauce.


Photobucket - Video and Image Hosting

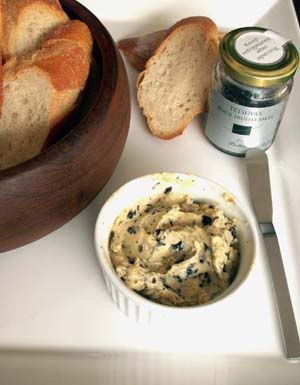
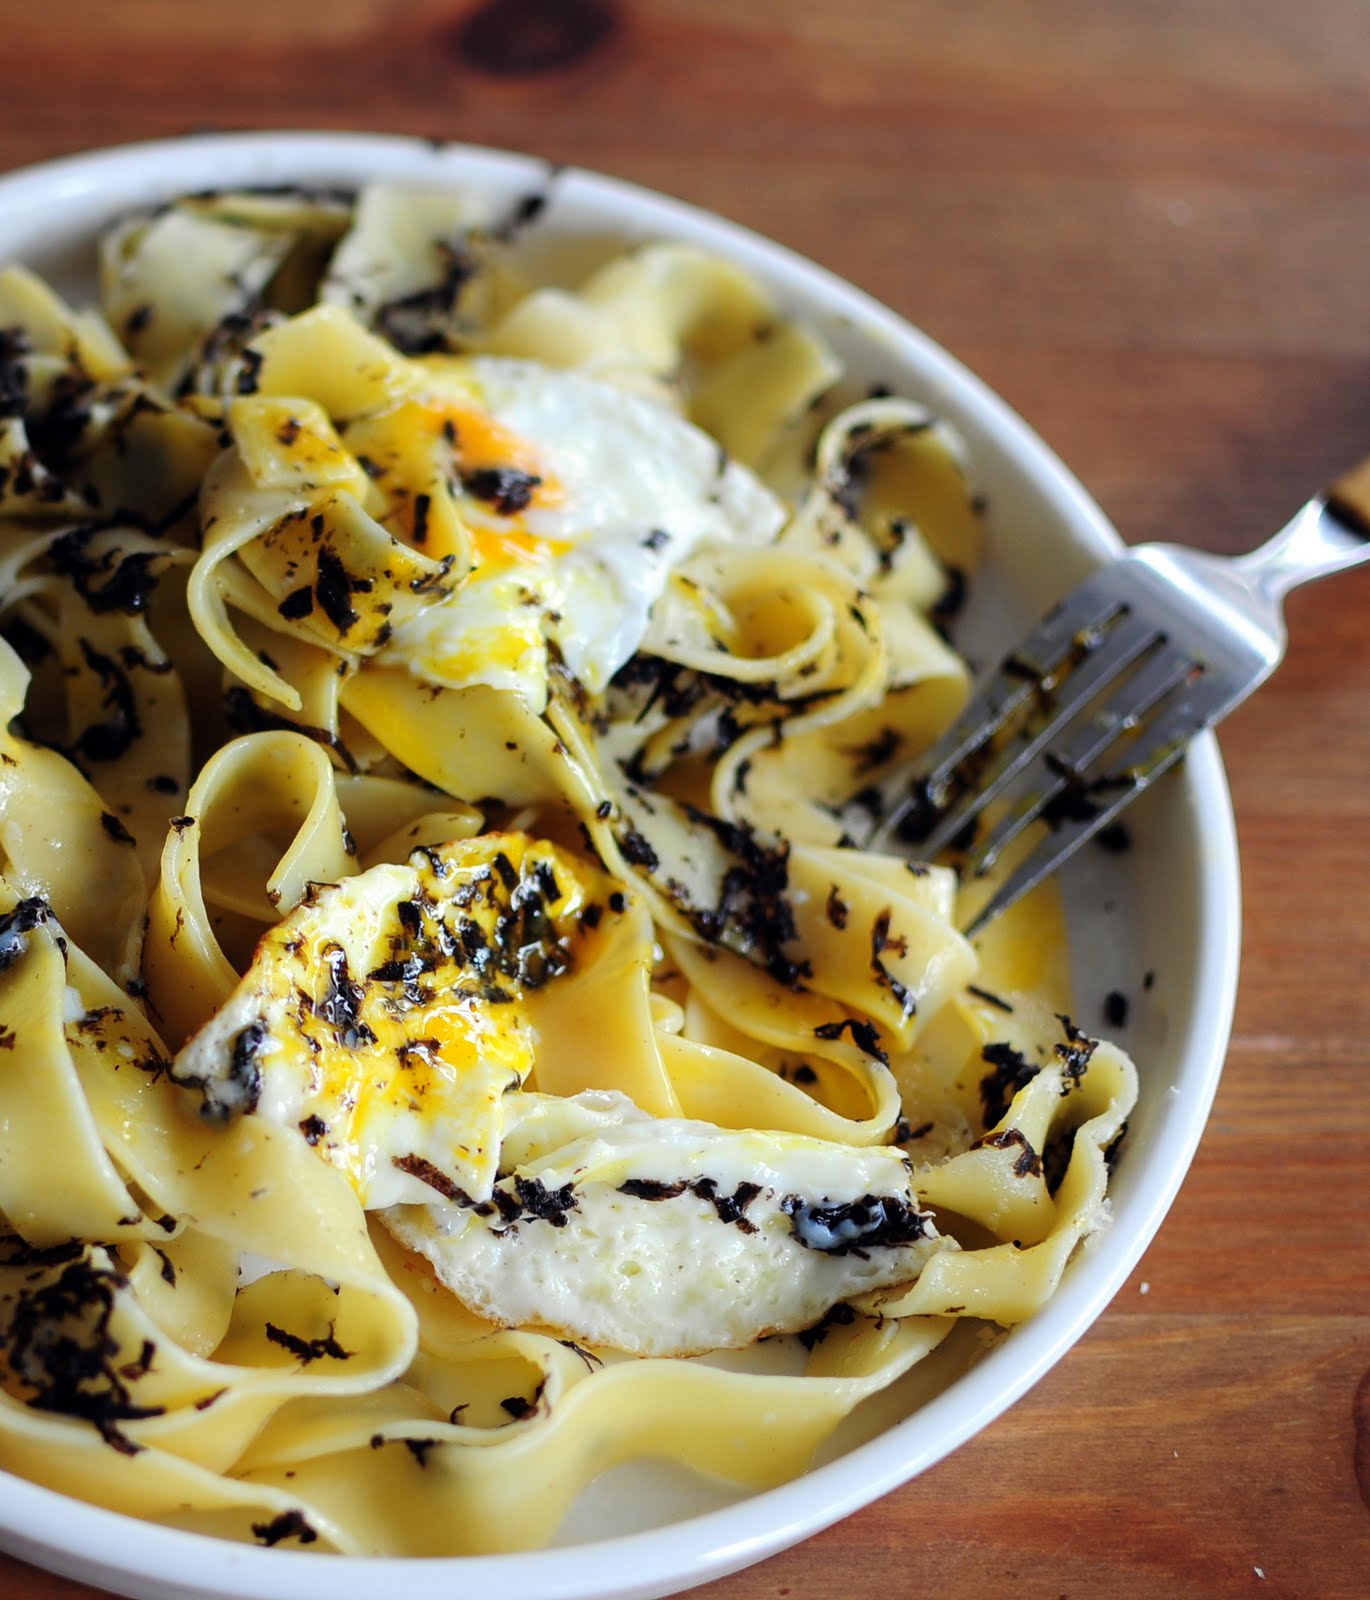
Lunch was filling and drowsy (too much sugar!). To start off, I served hot toasty bread with truffle butter, just for good measure, so that if everything else went wrong, at least the guest could say, we had some damn good butter. The truffles for the truffle butter was a food gift from N, a good foodie friend of mine, who came back from Sydney a while ago beaming and gushing about her meal at Tetsuya (we are jealous) and brought a bottle truffles (for butter) by Tetsuya, the recipe for the decadent and utterly sinful butter and a warning that the butter is addictively yummy that her sister got rather full on it even before their dinner even started. Well, it was some damn fine truffle butter and rightfully so: butter (fat = smooth texture + flavour) + truffles (flavour) = smooth super flavour.

Photobucket - Video and Image Hosting

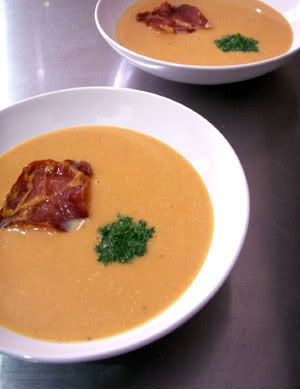
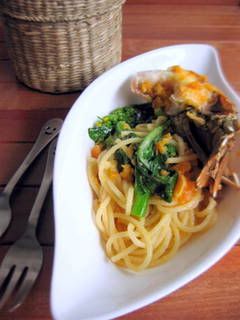
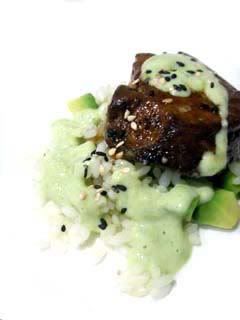
Not to be outdone by truffles, the maple syrup courses were rather good too. The maple syrup in the soup gave it a roundness and deeper sweetness, but with the addition of cinnamon and nutmeg, it tasted more like a Christmas soup rather than a soup. Good soup but maybe wrong season. The pride of lunch, however, was the plump slab of Norwegian salmon in the oven. I’m proud to announce that I (thankfully) didn’t overcook it and the maple syrup glaze cum sauce that was like nectar punctuated with candied pieces of ginger that mellowed during the reduction process. Credit to Clement for pointing me to the recipe, Thanks!

Cedar Planked Salmon with Maple Glaze
Serves 6

Ingredients:
1 cup pure maple syrup
2 tablespoons finely grated peeled fresh gingerroot
4 tablespoons fresh lemon juice
3 tablespoons soy sauce
1 1/2 teaspoons minced garlican untreated cedar plank (about 17 by 10 1/2 inches; if desired)
2 1/2-pound center-cut salmon fillet with skin
greens from 1 bunch scallions

Directions:

1. In a small heavy saucepan simmer maple syrup, gingerroot, 3 tablespoons lemon juice, soy sauce, garlic, and salt and pepper to taste until reduced to about 1 cup, about 30 minutes, and let cool. (Maple glaze may be made 2 days ahead and chilled, covered. Bring maple glaze to room temperature before proceeding.)

2. Preheat oven to 175° C (350° F). If using cedar plank, lightly oil and heat in middle of oven 15 minutes; or lightly oil a shallow baking pan large enough to hold salmon.

3. Arrange scallion greens in one layer on plank or in baking pan to form a bed for fish.

4. In another small saucepan heat half of glaze over low heat until heated through to use as a sauce. Stir in remaining tablespoon lemon juice. Remove pan from heat and keep sauce warm, covered.

5. Put salmon, skin side down, on scallion greens and brush with remaining glaze. Season salmon with salt and pepper and roast in middle of oven until just cooked through, about 20 minutes if using baking pan or about 35 if using plank.

6. Cut salmon crosswise into 6 pieces. On each of 6 plates arrange salmon and scallion greens on a bed of mashed potatoes. Drizzle salmon with warm sauce.

* I substituted paperbark for cedar plank.

Recipe source: http://www.epicurious.com/recipes/recipe_views/views/14473

Labels: , , ,

Friday, April 28, 2006

Don’t forget to salt!

Simplify simplify simplify. Let’s make cooking really simple. This week during one of my food geek conversations with a fellow foodie, we compared out latest cook book acquisitions, discussed about how we often bought faster than we could read and basically hoarded more books rather than cooking from them. I will admit, I’m a “book hoarder”, I buy and hoard for all sorts of reasons from the frivolous such as the pictures are so pretty to the more practical ones such as those recipes are easy to follow and to cook from. Books with gorgeous photographes and food that make me want to lick the pictures of the pages are usually flipped through, drooled over, thought about and then placed back on the shelf. The main reason being, if I really wanted to successfully execute the recipe, I might have to either build myself a commercial kitchen and hire and army of kitchen help or spend a few good days sourcing for the perfect ingredients. I sometimes like painless cooking (ie. no real slaving behind the stove necessary) with perfect results. I’m pleased to share that I’ve found one fantastic fun way of cooking. All you need are 3 different items and an oven!

Fresh fish
Egg whites
Salt

I had the privilege of working with a super yummy and fresh Murray cod so that made my job even easier. The Murray cod is a freshwater fish that is found in the Marry-Darling Basin in Australia. This fish is farmed and wild forms are available but are harder to come by with over fishing. Nonetheless, sometimes it is hard to screw up when you start with good fresh ingredients. Don’t try anything stupid like putting a super complex sauce on it that make take 5 hours to make from start to finish (stock included) that would steal the attention of the ingredient’s natural flavours. Just try to bring the ingredient to life and don’t waste it, after all, it did give up its life for the purpose of being food.

Here’s the shamelessly simple recipe:

Salt Baked Murray Cod
Serves 4


Ingredients:
1 Murray Cod
8 Egg whites
2 kg Salt

Directions:

1. Preheat oven to 200°C (400°F). Line a baking tray with parchment paper.
2. Using a large mixing bowl, mix egg whites and salt together until well combined.
3. Spread about one-third of the salt mixture onto the baking tray, spreading out evenly to form a 1-cm (½-in) base.
4. Place fish on salt base and cover the cod completely with remaining salt mixture. Firmly pat in salt mixture into fish.
5. Bake in the centre of the oven for 40 minutes. Remove to rest for 15 minutes.
6. Crack open salt crust and clean off as much salt as possible. Transfer to a serving plate.

* This recipe is an adaptation from the Salmon baked in Salt recipe from Paul Bertolli, Cooking with Hand.


Instead of Bertolli’s recommended Prosecco sauce, I served the fish with a crispy potato gratin stacks. The two worked well together as the high butter content from the gratin was “self-saucing”.

Labels: , , ,

Monday, February 06, 2006

Easy Japanese

This is fast becoming one of our favourite dinner meals. Being awfully simple to put together without breaking a sweat, it is a great recipe to file away for weekday dinners. What more, with the rice cooker, most of the hard work is done without you lifting a finger, the only real work you need to do is to measure out everything in the right quantities, or you could even “eyeball” it, dump it into the rice cooker, press the cook button and volia the meal is ready.

Steamed Salmon Rice with Mushrooms
Serves 4


Ingredients
6 dried shiitake mushrooms
500 ml hot water
2 cups uncooked Japanese rice
2 Tbsp soy sauce
3 Tbsp sake
3 tsp rice vinegar
½ tsp salt
200 g skinless salmon fillets
4 tsp mirin
Nori, to garnish
Toasted sesame seeds, to garnish

Method

1. Soak shiitake mushrooms in hot water for 10 minutes, drain and gently squeeze to remove excess liquid. Remove shiitake stalks and slice thinly. Reserve soaking liquid.
2. Combine reserved mushroom liquid, Japanese rice, soy sauce, sake, rice vinegar and salt and add all the ingredients to a rice cooker.
3. Place, salmon and sliced shiitake on top of rice and let the rice cooker work its magic.
4. Once rice is cooked, use a fork to flake salmon and stir in mirin.
5. Scoop rice into serving bowls and garnish with nori and sesame seeds.

* Recipe source: Quick and Easy Japanese Recipes (Periplus Mini Cookbooks)

Labels: , , ,

Tuesday, January 31, 2006

My New Sushi Box

My dad once turned to me in a shopping centre and told me, the difference between men and women when it comes to shopping is that men are hunters; they know what they want when they enter the store and they hunt the item down. Women on the other hand are gatherers, they will walk around the store, look around for things they need and do not need and gather them together. This time my dad was right. While out looking for a larger pestle and mortar to replace the one I have at home, I ended up coming home without the pestle and mortar but an oshibako (wooden mould used to make pressed sushi). When I reflect about it, a sushi box is pretty different and far off from the original item I was looking for but nonetheless I’m rather satisfied with my new kitchen member.

To put my new kitchen baby to the test, I made some oshizushi (pressed sushi) over the past 2 days for lunch, dinner and lunch again. By the third attempt in 24 hours, I think I can safely say I’ve mastered the simple art of oshizushi. The whole process is rather gratifying. It all begins with first lining the box with some sushi rice followed a layer of topping and then pressing it all down with the lid. The final and my favourite step is the act of pulling off the mould to reveal the beautiful compact rectangle of edible art. All that is left is to cut the rice block up into bite sized portions and to top with some nori. Oh the joys of oshizushi!

Spicy Maguro Oshizushi


Ingredients:

500 g cooked sushi rice
500 g sashimi grade maguro, cut into 0.5cm cubes

Spicy dressing
¾ cup Japanese mayonnaise
3 Tbsp sambal
Juice from ½ lemon
2 Tbsp dried bonito flakes
1 Tbsp tobikko
Salt to taste
Nori for garnish

Method:
1. Combine all the ingredients for spicy dressing.
2. Gently fold in tuna into spicy dressing and coat well.
3. Line oshibako with a layer of sushi rice and followed by a layer of spicy tuna mixture. Press the lid down. Continue to press the lid down and slowly lift the box away. Remove lid and slice into desired sizes. Garnish with nori and serve.

* Recipe adapted from Florence Tyler’s Real Kitchen

Labels: , , ,